
Teaching someone to swim requires much more than a well-designed pool. Students must be able to clearly see instructors, instructors need an unobstructed view of every swimmer, and lifeguards must quickly recognize potential safety concerns throughout the facility.
Lighting plays a critical role in achieving these goals.
Unlike recreational pools, swim schools operate as instructional environments where visibility, comfort, and safety directly influence learning outcomes. Poor lighting can create distracting glare on the water’s surface, obscure underwater visibility, increase eye fatigue, and make it more difficult for instructors to monitor students effectively.
Modern Indoor Swimming Pool Lighting Fixtures are engineered specifically for these demanding environments. They provide uniform illumination while resisting the humidity, condensation, and chloramine exposure that quickly deteriorate standard commercial lighting fixtures.
Whether designing a new learn-to-swim facility, renovating an existing swim school, or upgrading a municipal aquatic center, selecting the right LED lighting system creates a safer, more comfortable environment for students, instructors, lifeguards, and spectators alike.
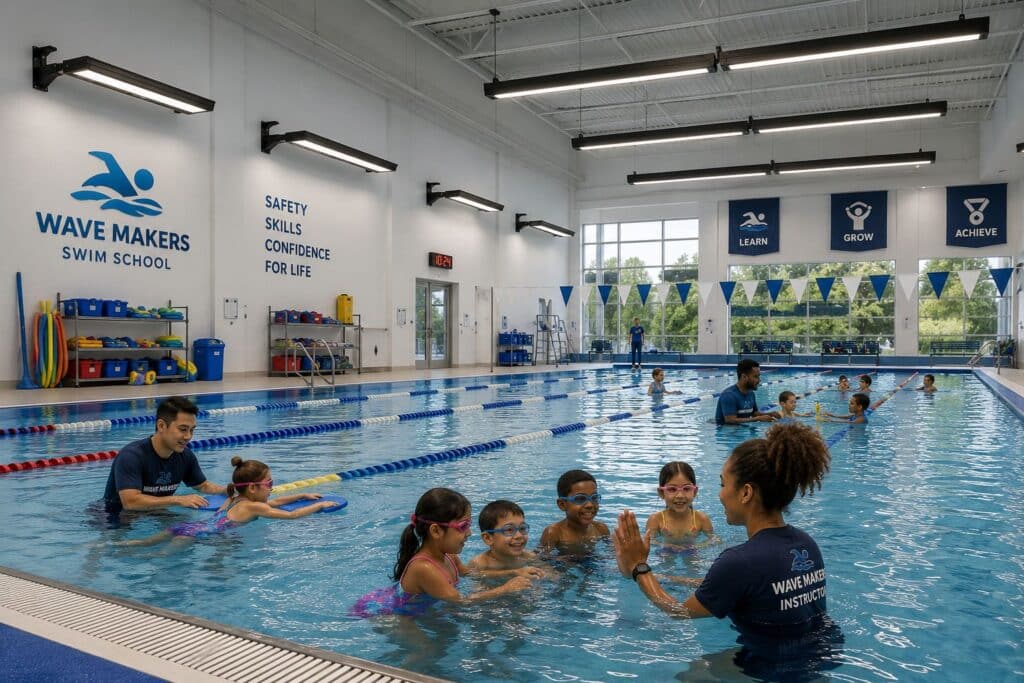
Properly designed LED lighting helps swim schools improve safety, instructor visibility, student confidence, and long-term operating efficiency.
Designing a New Swim School or Upgrading an Existing Aquatic Facility?
LED Pros WorldWide provides corrosion-resistant indoor swimming pool lighting designed specifically for humid natatorium environments. Our specialists can help you select fixtures that improve visibility, reduce maintenance, and create a comfortable learning environment for swimmers of all ages.
Call 1-844-533-7767 to speak with an aquatic lighting specialist.
Why Swim Schools Have Unique Lighting Requirements
Unlike competitive aquatic centers, the primary mission of a swim school is education.
Students range from toddlers experiencing the water for the first time to adults learning essential water safety skills. Every lesson depends on clear communication between instructor and student.
Effective lighting supports that learning process by helping instructors:
- Demonstrate proper swimming techniques.
- Observe body position and stroke mechanics.
- Monitor underwater movement.
- Maintain visual contact with every student.
- Quickly identify signs of distress.
- Create a welcoming, confidence-building environment.
For beginning swimmers, a bright and inviting natatorium often reduces anxiety and encourages participation.
🏊 Design Insight
In a swim school, lighting is not simply about illuminating the water—it’s about allowing instructors, lifeguards, parents, and students to see each other clearly. Balanced vertical and horizontal illumination is just as important as overall brightness because facial expressions, hand signals, and underwater movement are essential parts of the learning process.
Visibility Builds Student Confidence
Many first-time swimmers, especially young children, arrive feeling nervous or apprehensive.
A brightly illuminated aquatic environment helps create a sense of openness and security.
Good lighting allows students to:
- Clearly see instructors.
- Maintain visual contact with parents viewing lessons.
- Better judge water depth.
- Recognize lane markings.
- Navigate pool entries and exits safely.
- Feel more comfortable in unfamiliar surroundings.
Reducing harsh shadows and dark corners creates an environment that feels clean, organized, and professionally managed—qualities that help build trust with both students and parents.
Helping Instructors Teach More Effectively
Swim instructors rely heavily on visual observation throughout every lesson.
Whether teaching floating techniques, freestyle, breaststroke, or water safety skills, instructors must continuously evaluate body positioning, breathing patterns, and student movement.
Proper LED lighting improves an instructor’s ability to:
- Observe kicking technique beneath the water’s surface.
- Demonstrate arm positioning.
- Monitor multiple students simultaneously.
- Identify developing safety concerns.
- Maintain eye contact during instruction.
Uniform lighting also reduces eye strain during long teaching sessions, improving comfort for instructors working throughout the day.
📐 Specification Tip
Instead of selecting fixtures based solely on lumen output, prioritize lighting systems that provide uniform illumination with effective glare control. Reducing reflections on the water’s surface improves underwater visibility and allows instructors and lifeguards to monitor swimmers more effectively
Reducing Glare and Improving Underwater Visibility
The water surface inside a swimming pool acts like a large reflective plane. When fixtures are positioned incorrectly or use poorly controlled optics, light can reflect directly into the eyes of instructors, lifeguards, students, and spectators.
This reflected glare may make a pool appear bright while actually reducing useful visibility.
In a swim school, excessive glare can make it more difficult to:
- See swimmers beneath the water.
- Observe a student’s body position.
- Monitor multiple lanes at once.
- Recognize signs of fatigue or distress.
- View lane markings, steps, drains, and pool edges.
- Maintain comfortable visibility during long instruction periods.
The goal is not simply to install the brightest fixtures available. The goal is to distribute light evenly across the pool, deck, walls, entrances, and instructional areas while limiting harsh reflections from the water.
Fixture Placement Matters
Fixtures should generally be positioned so their strongest light does not reflect directly from the pool surface toward primary viewing positions.
Important viewing locations include:
- Instructor stations
- Lifeguard chairs
- Pool decks
- Parent viewing areas
- Spectator seating
- Staff offices overlooking the pool
Lighting layouts should account for the pool’s dimensions, ceiling height, fixture mounting locations, beam angles, deck configuration, and the location of windows or skylights.
A professional photometric layout can help identify overly bright areas, dark zones, and potential glare problems before fixtures are installed.
🏊 Design Insight
A pool deck may appear adequately illuminated while the water remains difficult to see through. Effective swim-school lighting must be evaluated from the instructor’s and lifeguard’s actual viewing positions—not solely by measuring light at floor level.
Horizontal and Vertical Illumination
Most commercial lighting discussions focus on horizontal illumination, which measures the light reaching a flat surface such as a floor, desk, or pool deck.
Swim schools also depend heavily on vertical illumination.
Vertical light helps instructors and students clearly see:
- Faces and expressions
- Hand signals
- Body position
- Wall-mounted signs
- Pool depth markers
- Emergency equipment
- People entering or exiting the water
A lighting system that illuminates only the pool deck from directly overhead may produce insufficient light on faces and vertical surfaces.
Combining carefully selected overhead fixtures with wall-mounted or indirect lighting can create a more balanced visual environment.
Avoiding Bright Spots and Dark Zones
Uneven illumination can create visual discomfort and make it harder for instructors to monitor the entire pool.
Common problem areas include:
- The water directly beneath fixtures
- Pool corners
- Deep-water sections
- Areas beneath diving platforms
- Stairways and ramps
- Equipment storage zones
- Spectator walkways
- Changing-room entrances
Uniformity is especially important in facilities where lessons involve several groups operating simultaneously.
📐 Specification Tip
Ask for a photometric plan that evaluates both average light levels and uniformity. A high average reading does not guarantee good visibility if some areas are excessively bright and others remain noticeably dark.
Choosing the Right Color Temperature
Color temperature influences how bright, comfortable, and inviting a swim school feels.
The two most common choices for indoor aquatic facilities are 4000K and 5000K.
4000K Lighting
A 4000K neutral-white appearance often creates a comfortable balance between visual clarity and warmth.
It may be appropriate for:
- Children’s swim schools
- Learn-to-swim facilities
- Therapy pools
- Family aquatic centers
- Hotel pools
- Community recreation facilities
The slightly softer appearance can help make the facility feel welcoming without sacrificing visibility.
5000K Lighting
A 5000K cool-white appearance produces a crisper, more daylight-like environment.
It may be appropriate for:
- Competitive training pools
- Large municipal aquatic centers
- University facilities
- High-ceiling natatoriums
- Facilities requiring a very bright visual appearance
However, higher color temperature does not automatically improve visibility. Optics, glare control, fixture placement, and uniformity remain more important than choosing the coolest available light.
Should a Swim School Use 4000K or 5000K?
For many instructional facilities, 4000K provides an effective balance of comfort and clarity. Facilities with large competition pools or very high ceilings may prefer 5000K.
The entire facility should generally use a coordinated color temperature so the pool, deck, viewing areas, and entrances do not appear visually mismatched.
Why Color Rendering Matters
The Color Rendering Index, or CRI, measures how accurately a light source reveals colors compared with a reference light source.
Good color rendering helps instructors and lifeguards identify:
- Skin tone changes
- Facial expressions
- Swimsuit colors
- Lane markers
- Safety equipment
- Warning signs
- Pool-depth markings
Color rendering can also improve the overall appearance of the water, tile, walls, and architectural finishes.
A commercial fixture with 80+ CRI is often appropriate for general natatorium use. Facilities with specialized instructional, therapy, filming, or broadcast requirements may benefit from higher color-rendering performance.
Inline Buyer Q&A
Is higher CRI more important than higher lumen output?
Both specifications matter, but they serve different purposes. Lumen output determines the quantity of light, while CRI affects how clearly colors and visual details appear. A well-designed swim school should have adequate light output, good uniformity, controlled glare, and suitable color rendering.
Why Standard Commercial Fixtures Fail in Natatoriums
A natatorium is not a typical indoor commercial environment.
Warm temperatures, continuous humidity, condensation, airborne chloramines, and chemical cleaning products create conditions that can rapidly deteriorate fixtures not designed for aquatic facilities.
Standard commercial high bays or ceiling fixtures may initially appear suitable because they are installed indoors. However, their finishes, gaskets, hardware, drivers, wiring, and mounting components may not be engineered for continuous exposure to corrosive pool air.
Premature deterioration can include:
- Rust on screws, brackets, and mounting hardware
- Peeling, bubbling, or discoloration of painted surfaces
- Corrosion around fixture seams
- Degraded seals and gaskets
- Moisture intrusion
- Clouding or discoloration of lenses
- Driver and electrical component failures
- Seized hardware that complicates maintenance
- Shortened fixture service life
This is why indoor swimming pool lighting should be selected specifically for natatorium use rather than based only on wattage, lumen output, or fixture appearance.
Swim schools primarily emphasize student comfort, instructor visibility, parent viewing, and safe lesson environments. Larger municipal aquatic centers, universities, competition pools, diving facilities, and mixed-use recreation centers require a broader facility-wide approach.
Review our Natatorium Lighting Design Guide for detailed guidance on competition areas, spectator seating, glare control, photometric planning, controls, emergency lighting, corrosion resistance, and lifecycle costs.
Chloramines and the Natatorium Environment
Chloramines form when chlorine reacts with organic contaminants introduced into pool water by swimmers.
These compounds can become airborne and collect in the warm, humid air above the pool. Because lighting fixtures are commonly installed high above the water, they remain continuously exposed to this corrosive atmosphere.
The concentration of chloramines may be especially aggressive:
- Directly above the pool surface
- Near warm-water instructional pools
- Around therapy pools
- Near poorly ventilated areas
- Around ceiling structures where humid air collects
- In facilities with inadequate air circulation
Lighting fixtures must therefore resist both moisture and chemical corrosion.
An ordinary damp-location rating alone may not provide sufficient protection.
Why Marine-Grade Powder Coating Is Necessary
A marine-grade powder-coated finish creates a durable protective barrier over the fixture housing.
Unlike basic painted finishes, a properly applied powder coating is designed to resist:
- Chloramine exposure
- Persistent humidity
- Condensation
- Chemical cleaning products
- Surface oxidation
- Salt-laden air in coastal locations
- Chipping, peeling, and blistering
The coating helps prevent corrosive contaminants from reaching the underlying metal.
This protection is especially important around edges, seams, brackets, access covers, and mounting points, where ordinary finishes may begin deteriorating.
Marine-grade powder coating also helps maintain the fixture’s appearance. A rusted or peeling fixture can make an otherwise clean swim school look poorly maintained and may create concerns among parents, staff, and inspectors.
📐 Specification Tip
Do not assume every powder-coated fixture is suitable for a natatorium. Ask whether the finish is specifically rated or recommended for corrosive aquatic environments and whether corrosion protection extends to brackets, mounting components, and access covers.
Why 316 Stainless Steel Screws and Hardware Matter
Fixture housings are only one part of the corrosion-resistance system.
Screws, latches, brackets, hinges, mounting hardware, and exposed fasteners must also withstand the natatorium environment.
Lower-grade hardware may begin corroding even when the fixture housing remains intact.
316 Stainless Steel vs. 304 Stainless Steel
Both 304 and 316 stainless steel are commonly used in commercial construction, but they do not provide identical corrosion resistance.
Type 316 stainless steel contains molybdenum, which improves its resistance to chlorides and aggressive chemical environments.
This makes 316 stainless steel a stronger choice for indoor aquatic facilities.
Benefits include:
- Greater resistance to chloramine exposure
- Reduced likelihood of rust staining
- Improved resistance to pitting and surface corrosion
- Longer fastener life
- Easier maintenance and servicing
- Lower risk of screws seizing inside the housing
A fixture can become difficult or impossible to service if corroded screws cannot be removed. Technicians may then be forced to drill out hardware, damage the fixture housing, or replace the entire fixture instead of servicing an internal component.
For this reason, specifying marine-grade powder-coated housings with 316 stainless steel screws and hardware is not merely an aesthetic preference. It is an important maintenance and lifecycle decision.
Sealed Construction and IP Ratings
Corrosion resistance should be combined with sealed fixture construction.
An IP rating describes the degree of protection an enclosure provides against solid particles and moisture.
For many natatorium applications, fixtures with an IP65 or higher rating are preferred.
An IP65-rated fixture is designed to resist:
- Dust intrusion
- Humid air
- Condensation
- Water jets from routine cleaning
- Moisture entering through exposed fixture openings
However, the IP rating alone does not guarantee resistance to chloramines.
A fixture may be well sealed but still use finishes, screws, brackets, or internal components that are vulnerable to corrosion.
The strongest natatorium fixture specifications usually combine:
- IP65 or higher sealed construction
- Marine-grade powder coating
- 316 stainless steel screws and hardware
- Corrosion-resistant mounting components
- Sealed lenses and gaskets
- Protected LED drivers and wiring compartments
- Materials selected for aquatic environments
LED High Bays, Suspended Fixtures, and Wall Lighting
Different swim schools require different fixture combinations.
Corrosion-Resistant LED High Bays
High bays are commonly used in large natatoriums with tall ceilings.
They can provide:
- High lumen output
- Wide or controlled beam distributions
- Efficient illumination from elevated mounting heights
- Fewer fixtures across large pool areas
High bays selected for natatoriums should include corrosion-resistant housings, sealed construction, suitable mounting hardware, and optics designed to limit glare.
Suspended LED Fixtures
Suspended fixtures may be used when the structural ceiling is extremely high or when fixtures must be positioned closer to the pool and deck.
They can improve light delivery but require careful attention to:
- Suspension hardware
- Cable and chain corrosion resistance
- Fixture movement
- Mounting stability
- Maintenance access
- Chloramine exposure
Every exposed suspension component should be suitable for the same corrosive environment as the fixture.
Wall-Mounted Lighting
Wall-mounted fixtures can supplement overhead lighting and improve vertical illumination.
They may be particularly helpful around:
- Instructional areas
- Pool entrances
- Stairways
- Ramps
- Spectator seating
- Parent viewing areas
- Equipment zones
Wall fixtures must be placed carefully to avoid direct glare toward swimmers and instructors.
Recessed and Architectural Lighting
Recessed downlights and architectural fixtures may be used in reception areas, offices, viewing rooms, and circulation spaces located outside the most aggressive pool-air zone.
Fixtures located within the natatorium itself should still be evaluated for humidity, corrosion, and moisture exposure.
Lighting the Pool Deck and Instructional Areas
The pool is not the only part of the facility requiring proper illumination.
Swim-school lighting should also support safe movement throughout the building.
Important areas include:
- Pool decks
- Changing areas
- Restrooms
- Showers
- Equipment storage
- First-aid stations
- Lifeguard stations
- Seating areas
- Reception desks
- Hallways
- Emergency exits
Transitions between bright and dark spaces should be minimized. Someone leaving a brightly illuminated pool area should not enter a poorly lit hallway or changing room.
Floor surfaces may also become slippery, making clear visibility around steps, drains, ramps, and elevation changes especially important.
🏗️ Project Spotlight: When Standard Indoor Fixtures Corrode Early
We have spoken with aquatic-facility operators who initially selected standard commercial fixtures because the products were marketed for indoor or damp-location use.
The fixtures performed adequately at first. Within several years, however, corrosion began appearing around screws, mounting brackets, fixture seams, and access covers.
In some cases:
- Fasteners rusted and became difficult to remove.
- Painted surfaces blistered or peeled.
- Moisture reached internal electrical compartments.
- Mounting hardware deteriorated before the LED system failed.
- Fixtures had to be replaced earlier than planned.
The problem was not the LED technology itself. The fixtures had not been constructed for prolonged exposure to airborne chloramines.
For later projects, the facility operators selected fixtures with marine-grade powder-coated housings, 316 stainless steel screws, sealed optical compartments, and corrosion-resistant mounting hardware.
Although these products required a higher initial investment, they provided a much stronger defense against the conditions above the pool and reduced the risk of premature replacement.
Project Takeaway
In a swim school or natatorium, fixture lifespan depends on more than the LEDs and driver. The housing finish, screws, brackets, seals, gaskets, and mounting hardware must all be designed to survive the same corrosive environment.
Specifying a Complete Corrosion-Resistance Package
When evaluating fixtures, avoid focusing on a single feature.
A strong natatorium specification should address the entire fixture assembly.
Ask the supplier to confirm:
- Is the housing marine-grade powder coated?
- Are exposed screws and fasteners 316 stainless steel?
- Are mounting brackets corrosion resistant?
- Is the fixture IP65 or higher?
- Are the lens and optical compartments sealed?
- Are gaskets designed for heat, humidity, and chemical exposure?
- Is the driver protected from moisture and corrosive air?
- Are suspension components suitable for natatorium use?
- Is the warranty valid when the fixture is installed above an indoor pool?
- Is the fixture specifically recommended for chloramine-rich environments?
These questions help distinguish a true natatorium fixture from a standard commercial product with only limited moisture protection.
Matching the Lighting Design to the Type of Swim School
Not every swim school operates the same way.
A facility serving toddlers and first-time swimmers has different lighting priorities from a competitive training center, therapy pool, or large municipal aquatic facility.
The lighting design should reflect:
- The age and experience of swimmers
- Pool depth
- Ceiling height
- Lesson format
- Instructor positions
- Parent viewing areas
- Operating hours
- Maintenance access
- Emergency egress requirements
- The presence of diving platforms or specialized equipment
Understanding how the facility is used helps determine fixture type, lumen output, beam distribution, control strategy, and mounting location.
Learn-to-Swim and Children's Instruction Pools
acilities focused on young children should feel bright, welcoming, and easy to navigate.
Lighting priorities often include:
- Comfortable 4000K illumination
- Strong facial visibility
- Minimal glare
- Clear views of shallow-water areas
- Good illumination around steps and ramps
- Bright parent viewing areas
- Smooth transitions between reception, changing, and pool spaces
Young swimmers often rely on visual contact with instructors and parents for reassurance.
Harsh reflections, dark corners, and overly cool lighting can make the environment feel less comfortable than necessary.
A balanced design should support both safety and confidence without making the space feel overly clinical.
🏊 Design Insight
For swim schools serving toddlers and young children, the most successful lighting systems often prioritize comfort, uniformity, and facial visibility over extreme brightness.
Instructional and Technique-Training Pools
Instructional pools serving older children, adults, and developing swimmers require excellent visibility across the full pool area.
Instructors may need to observe:
- Stroke mechanics
- Breathing patterns
- Turns and wall approaches
- Kicking technique
- Body alignment
- Underwater movement
- Lane discipline
These facilities benefit from carefully controlled overhead lighting with strong uniformity and limited surface glare.
Supplemental vertical illumination may also improve communication between instructors and swimmers.
Lighting should remain consistent from one end of the pool to the other so students do not move through alternating bright and dark zones during instruction.
Therapy and Rehabilitation Pools
Therapy pools are commonly found in:
- Hospitals
- Rehabilitation centers
- Senior living communities
- Sports medicine facilities
- Physical therapy clinics
- Wellness centers
These facilities often operate at warmer water temperatures, which can increase humidity and intensify the corrosive conditions above the pool.
Lighting priorities include:
- Comfortable visual conditions
- Reduced glare
- Clear step and ramp visibility
- Good facial recognition
- Smooth, even illumination
- Support for users with limited mobility or reduced vision
A neutral 4000K color temperature is often suitable because it provides visual clarity without creating an excessively cool appearance.
Fixture placement should also account for lifts, handrails, ramps, therapy equipment, and staff observation positions.
Competitive Training Pools
Competitive training facilities generally require higher-performance lighting systems.
These may include:
- High-output corrosion-resistant LED high bays
- Narrower or specialized beam distributions
- Higher mounting heights
- Multiple fixture rows
- Enhanced lane uniformity
- Improved visibility at starting blocks and turn walls
- Zoned controls for practice, cleaning, and events
These facilities may prefer 5000K lighting for a brighter, crisper appearance, particularly where competitive swimming, timing systems, photography, or video recording are involved.
The design must still control reflected glare. Simply increasing fixture wattage can make visibility worse if the water surface produces strong reflections.
Municipal and Community Aquatic Centers
Municipal aquatic centers often contain several activity zones within one building.
These may include:
- Instruction pools
- Competition pools
- Therapy pools
- Children’s play areas
- Diving wells
- Spectator seating
- Locker rooms
- Staff offices
- Community meeting spaces
A single lighting approach may not work across the entire facility.
Different zones may require separate fixture types, output levels, beam patterns, and controls.
For example, a competition pool may require high-output overhead lighting, while a children’s instructional pool may benefit from softer, glare-controlled illumination.
Zoned lighting controls allow operators to illuminate only the areas in use, reducing energy consumption during low-occupancy periods.
Pool Deck Lighting and Safe Circulation
The pool deck is one of the most important safety zones in the facility.
Wet surfaces, ramps, drains, steps, hoses, equipment carts, and changing elevations can create hazards when lighting is uneven or insufficient.
Pool-deck lighting should provide clear visibility around:
- Stairs and ladders
- Pool-entry points
- Ramps
- Handrails
- Floor drains
- Depth markers
- Starting blocks
- Diving structures
- Equipment storage
- Emergency exits
Fixtures should be arranged to reduce shadows cast by structural beams, diving platforms, partitions, and mechanical equipment.
Reflections from wet tile and polished surfaces should also be considered during layout planning.
📐 Specification Tip
Evaluate deck lighting when the surface is wet. Materials that appear easy to see under dry conditions may become much more reflective after lessons or cleaning.
Lighting Parent Viewing and Spectator Areas
Parent viewing is a central part of many swim-school operations.
Families need to see:
The pool
Their children
Instructors
Digital displays
Lesson progress
Entry and exit areas
Viewing areas should be bright enough for comfort but not so bright that glass reflections obscure the pool.
Where viewing rooms are separated from the natatorium by glass, the lighting inside the viewing area should be coordinated carefully. Excessively bright interior lighting can create reflections that reduce visibility through the window.
Glare-controlled ceiling lights, recessed downlights, and indirect architectural fixtures may work well in these spaces.
Facilities can compare additional options for adjacent waiting areas and reception spaces in our Commercial LED Ceiling Lights section.
Lighting Controls for Swim Schools
Lighting controls can significantly reduce energy use and extend fixture service life.
However, controls should be designed around how the facility actually operates.
Common control options include:
- Occupancy sensors
- Scheduling controls
- Daylight harvesting
- 0–10V dimming
- Zoned switching
- Scene controls
- Central building-management integration
Occupancy Sensors
Occupancy sensors can be effective in:
- Storage areas
- Restrooms
- Staff rooms
- Offices
- Equipment rooms
- Low-use corridors
They should be used more carefully in active pool areas, where uninterrupted illumination is essential.
The system should never reduce lighting unexpectedly while swimmers remain in the water.
Scheduled Controls
Swim schools often operate on predictable lesson schedules.
Automated scheduling can provide:
- Full output during lessons
- Reduced output during cleaning
- Lower output during setup periods
- Automatic shutoff after closing
- Separate control of unused zones
This approach can reduce wasted operating hours without compromising safety.
0–10V Dimming
Dimming allows facility operators to adjust light levels for different activities.
Possible settings include:
- Full instruction mode
- Reduced cleaning mode
- Maintenance mode
- Event mode
- After-hours mode
Controls and drivers must be compatible, and the dimming range should be tested during commissioning.
Daylight Harvesting
Natatoriums with windows or skylights may benefit from daylight-responsive controls.
However, daylight around indoor pools can be inconsistent and may create glare or contrast issues.
Sensors should be commissioned carefully so artificial lighting does not dim too aggressively when daylight reaches only part of the facility.
Inline Buyer Q&A
Can swim-school lighting be dimmed during lessons?
Yes, but the minimum light level must still support safe supervision, underwater visibility, and clear movement around the pool deck. Dimming should be based on an engineered control plan rather than convenience alone.
Emergency and Egress Lighting
Emergency lighting is essential in any aquatic facility.
A power interruption can create immediate safety concerns because swimmers may still be in the water while staff guide students and families toward exits.
Emergency lighting should clearly illuminate:
- Pool exits
- Deck pathways
- Stairways
- Ramps
- Exit doors
- First-aid locations
- Lifeguard stations
- Changing-area routes
- Reception and gathering points
The emergency system should be coordinated with applicable building, fire, electrical, and life-safety requirements.
Depending on the facility, the design may use:
- Emergency drivers
- Battery-backed fixtures
- Generator-supported circuits
- Dedicated emergency fixtures
- Illuminated exit signs
- Combination emergency units
Emergency lighting must be included in the original design rather than treated as an afterthought.
Maintenance Access Is Part of the Lighting Design
Natatorium fixtures are often installed above water, seating, or high structural ceilings.
This makes maintenance more difficult and expensive than in a standard commercial room.
Before selecting fixture locations, consider how technicians will access them.
Possible access methods include:
- Scissor lifts
- Boom lifts
- Portable scaffolding
- Catwalks
- Service platforms
- Pool covers
- Specialized access equipment
Fixtures mounted directly above the water may require closing the pool or bringing in specialized equipment for service.
Whenever possible, fixture placement should support safe access from the deck or perimeter.
Why Serviceable Drivers Matter
Even premium LED systems may eventually require driver replacement.
Selecting serviceable commercial fixtures can allow technicians to replace a failed driver without removing and discarding the entire fixture.
Ask whether:
- Replacement drivers are available
- Drivers can be accessed safely
- Wiring compartments are sealed
- Hardware can be removed after years of exposure
- Warranty parts are supported
- The fixture can be serviced without disturbing seals unnecessarily
This further reinforces the importance of 316 stainless steel screws and corrosion-resistant access hardware.
Developing a Preventive Maintenance Plan
Preventive maintenance helps identify problems before they become fixture failures or safety concerns.
A natatorium lighting inspection should include:
- Rust or discoloration
- Peeling or blistered coatings
- Loose mounting hardware
- Failed screws or brackets
- Damaged lenses
- Condensation inside fixtures
- Cracked or compressed gaskets
- Flickering or inconsistent output
- Discolored LEDs
- Driver noise
- Uneven dimming
- Corroded suspension cables or chains
Inspection frequency will depend on operating hours, facility conditions, ventilation, fixture construction, and local maintenance policies.
Cleaning should follow the manufacturer’s instructions. Harsh chemicals or abrasive methods may damage lenses, coatings, seals, or gaskets.
Energy Savings from LED Swim-School Lighting
Many older swim schools still operate metal halide, fluorescent, or other legacy lighting systems.
These systems may consume more energy, require frequent lamp replacement, and lose significant output as they age.
A properly designed LED retrofit can provide:
- Lower wattage
- Longer service life
- Reduced relamping
- Better lumen maintenance
- Instant-on operation
- Dimming compatibility
- Improved light distribution
- Lower cooling load
- Reduced maintenance disruption
The energy savings will depend on the existing system, operating schedule, fixture count, wattage, controls, and utility rates.
Energy Savings Snapshot
Consider a swim school replacing 30 existing 400-watt fixtures with 200-watt LED fixtures.
The wattage reduction is:
30 fixtures × 200 watts saved = 6,000 watts
If the lighting operates 12 hours per day, 365 days per year:
6 kW × 12 hours × 365 days = 26,280 kWh saved annually
At an electricity rate of $0.15 per kWh:
26,280 kWh × $0.15 = $3,942 in estimated annual energy savings
This estimate does not include potential savings from:
- Dimming
- Scheduling controls
- Reduced cooling demand
- Lower lamp-replacement costs
- Reduced lift rental
- Fewer pool closures for maintenance
Energy Insight
In high-ceiling aquatic facilities, avoided maintenance can be nearly as important as electricity savings because every fixture replacement may require specialized access equipment and operational disruption.
🏗️ Project Spotlight: Planning Around Lessons and Maintenance
A swim school preparing for an LED upgrade wanted to reduce energy use without disrupting a full schedule of children’s lessons.
The facility operated from early morning through the evening, leaving very little time for installation.
Instead of replacing fixtures randomly as time allowed, the project was divided into zones:
- The instructional pool
- Pool-deck circulation
- Parent viewing
- Reception
- Changing areas
- Staff and storage rooms
The contractor completed one zone at a time during planned closures and off-hours.
The new design included:
- Corrosion-resistant LED fixtures above the pool
- Marine-grade powder-coated housings
- 316 stainless steel hardware
- Glare-controlled optics
- Dimming for cleaning and setup periods
- Separate controls for viewing and support areas
- Improved access for future driver servicing
This phased approach allowed the swim school to remain operational while improving lighting quality, reducing wattage, and avoiding a prolonged facility shutdown.
Project Takeaway
A successful swim-school lighting upgrade depends on more than fixture selection. Installation scheduling, maintenance access, corrosion resistance, controls, and facility operations should all be planned together.
Planning a New Swim-School Lighting Project
A well-organized project begins with a detailed assessment.
Step 1: Document Existing Conditions
Record:
- Pool dimensions
- Ceiling heights
- Fixture quantities
- Existing wattages
- Mounting locations
- Electrical voltage
- Control systems
- Operating hours
- Maintenance access
- Corrosion damage
- Viewer and instructor positions
Photographs and reflected ceiling plans can help the lighting supplier understand the facility.
Step 2: Define the Facility’s Priorities
Clarify whether the project is intended to improve:
- Safety
- Underwater visibility
- Student comfort
- Instructor performance
- Energy efficiency
- Maintenance access
- Corrosion resistance
- Appearance
- Code compliance
- Parent viewing
Most projects involve several priorities, but identifying the most important goals helps guide fixture selection.
Step 3: Request a Photometric Layout
A photometric plan can evaluate:
- Fixture placement
- Beam distribution
- Average illumination
- Minimum illumination
- Uniformity
- Pool-deck coverage
- Wall and vertical illumination
- Potential glare zones
This is particularly important when replacing fixtures with a different lumen output, beam angle, or mounting height.
For broader planning principles, review our Commercial Lighting Layout Guide.
Step 4: Confirm Corrosion-Resistance Specifications
Do not approve fixtures based solely on a product image or general wet-location claim.
Confirm:
- Marine-grade powder-coated finish
- 316 stainless steel screws and hardware
- IP65 or higher sealed construction
- Corrosion-resistant mounting brackets
- Protected drivers
- Sealed lenses
- Natatorium-compatible warranty coverage
Step 5: Review Controls and Emergency Operation
Determine:
- Which areas need separate control
- Whether dimming is required
- Whether occupancy sensors are appropriate
- How emergency lighting will operate
- Whether the system connects to a building-management platform
- How staff will override automated controls
Step 6: Plan Installation and Commissioning
Installation planning should address:
- Pool closures
- Lift access
- Water protection
- Work above occupied areas
- Fixture aiming
- Dimming setup
- Emergency testing
- Final light-level verification
After installation, inspect the completed system from the actual instructor, lifeguard, parent, and swimmer viewpoints.
When Should a Swim School Replace Its Existing Lighting?
Replacement may be justified when the current system shows:
- Persistent fixture failures
- Visible corrosion
- Poor underwater visibility
- Excessive glare
- Uneven illumination
- High energy use
- Frequent lamp replacement
- Obsolete components
- Incompatible controls
- Difficult maintenance access
- Insufficient emergency lighting
Facilities do not always need to wait until fixtures fail completely.
A planned retrofit is often less disruptive and more cost-effective than repeated emergency repairs.
Our Commercial LED Lighting Retrofit Guide explains how to organize phased replacements, installation scheduling, budgeting, and commissioning.
A Complete System Is Better Than a Fixture-by-Fixture Approach
The strongest swim-school lighting projects are designed as complete systems.
A complete approach accounts for:
- The pool
- Pool deck
- Instructor positions
- Parent viewing
- Support spaces
- Emergency routes
- Controls
- Maintenance access
- Corrosion resistance
- Energy performance
Selecting fixtures one at a time without considering the overall layout can lead to mismatched color temperatures, inconsistent illumination, unnecessary glare, and difficult maintenance.
A coordinated plan produces a safer, more comfortable, and more professional aquatic environment.
Swim School Lighting Buyer Checklist
Before purchasing lighting for a swim school or indoor aquatic facility, review the complete system rather than comparing fixtures by wattage alone.
Facility and Layout
- Confirm pool dimensions and ceiling height.
- Identify instructional, therapy, competition, and spectator zones.
- Document fixture mounting locations.
- Review instructor, lifeguard, and parent viewing positions.
- Identify dark corners, glare zones, and difficult maintenance areas.
- Confirm pool-deck, ramp, stair, and exit lighting requirements.
- Request a professional photometric layout.
Fixture Construction
- Select fixtures specifically recommended for natatorium use.
- Require marine-grade powder-coated housings.
- Specify 316 stainless steel screws and exposed hardware.
- Confirm corrosion-resistant mounting brackets.
- Verify sealed lenses and optical compartments.
- Review gasket and seal materials.
- Confirm the fixture is suitable for continuous humidity and chloramine exposure.
- Avoid relying on a general indoor or damp-location rating alone.
Moisture and Corrosion Protection
- Specify IP65 or higher where appropriate.
- Confirm that the IP rating applies to the complete fixture assembly.
- Ask whether suspension cables, chains, brackets, and fasteners are corrosion resistant.
- Confirm the driver compartment is protected.
- Review corrosion-related warranty exclusions.
- Verify that installation above an indoor pool will not void the warranty.
Lighting Performance
- Select the appropriate lumen output.
- Review fixture beam distribution.
- Evaluate average and minimum illumination.
- Confirm acceptable uniformity.
- Reduce reflected glare from the water surface.
- Include adequate vertical illumination.
- Select a coordinated 4000K or 5000K color temperature.
- Specify 80+ CRI or higher where improved color rendering is needed.
Electrical and Controls
- Confirm voltage compatibility.
- Verify 0–10V dimming requirements.
- Select drivers compatible with the control system.
- Plan separate lighting zones.
- Review occupancy-sensor locations carefully.
- Consider scheduled controls.
- Evaluate daylight harvesting where appropriate.
- Confirm emergency and generator-supported circuits.
- Test all control sequences during commissioning.
Maintenance and Lifecycle
- Confirm safe access to every fixture.
- Identify whether lifts, scaffolding, catwalks, or pool closures will be required.
- Ask whether drivers can be replaced.
- Confirm replacement driver availability.
- Review expected fixture life.
- Compare standard 5-year and available premium 10-year warranties.
- Establish a preventive inspection schedule.
- Include future maintenance costs in the purchasing decision.
📐 Final Specification Tip
A strong natatorium lighting specification should combine appropriate light output, glare control, sealed construction, marine-grade powder coating, 316 stainless steel hardware, serviceable components, and warranty coverage valid for indoor aquatic environments. No single feature can compensate for weaknesses in the rest of the fixture.
Inline Buyer Q&A
Can standard commercial high bays be used above an indoor swimming pool?
Standard commercial high bays may provide sufficient light output, but many are not constructed to withstand chloramines, high humidity, condensation, and chemical exposure.
Fixtures installed inside the natatorium should be specifically designed or approved for indoor aquatic environments. Standard high bays may still be appropriate in adjacent offices, storage rooms, reception areas, or other spaces that are isolated from corrosive pool air.
Is IP65 enough for a natatorium fixture?
IP65 sealed construction is an important starting point, but it does not guarantee chloramine resistance.
A fixture may be sealed against dust and water while still using coatings, screws, brackets, drivers, or internal components that corrode in an aquatic environment.
The complete fixture should combine an appropriate IP rating with marine-grade finishes, 316 stainless steel hardware, sealed optics, protected electronics, and corrosion-resistant mounting components.
Why are 316 stainless steel screws necessary?
Screws and exposed fasteners are common points of early corrosion.
Type 316 stainless steel provides improved resistance to chlorides and aggressive chemical environments compared with lower-grade hardware. It also reduces the risk of rust staining, seized screws, damaged access covers, and difficult future servicing.
Is marine-grade powder coating necessary for an indoor pool?
Yes. Although the pool is indoors, the natatorium environment can be more corrosive than many outdoor locations.
Airborne chloramines, humidity, condensation, and cleaning chemicals continuously attack exposed surfaces. Marine-grade powder coating protects the fixture housing and helps prevent blistering, peeling, oxidation, and premature deterioration.
Should swim schools choose 4000K or 5000K lighting?
Many learn-to-swim facilities prefer 4000K because it provides clear, neutral-white illumination with a comfortable appearance.
Competitive training pools and very large aquatic centers may prefer 5000K for a brighter, cooler visual effect.
Fixture placement, glare control, uniformity, and optical performance remain more important than selecting the highest color temperature.
How important is a photometric layout?
A photometric layout is extremely important.
It helps determine fixture quantity, wattage, beam angle, spacing, average illumination, minimum illumination, and uniformity. It can also reveal potential bright spots, dark zones, and glare problems before installation begins.
Can pool lighting be dimmed?
Yes, provided the fixtures and drivers are dimming compatible.
Dimming can support cleaning, setup, after-hours operation, events, and reduced-use periods. The system should never dim below the level needed for safe supervision, underwater visibility, deck circulation, and emergency response.
Are LED fixtures maintenance free?
No lighting system is completely maintenance free.
LED fixtures eliminate routine lamp replacement and usually require less service than fluorescent or metal-halide systems. However, facilities should still inspect drivers, seals, lenses, coatings, screws, brackets, wiring, and mounting hardware.
Is a premium 10-year warranty worth it?
A premium warranty may provide significant value in aquatic facilities where fixtures are difficult or expensive to access.
A longer warranty is most valuable when it covers the driver, LEDs, housing, finish, and operation in a natatorium environment. Always review the warranty terms rather than relying only on the advertised warranty length.
Create a Safer, More Comfortable Swim-School Environment
Lighting affects nearly every part of the swim-school experience.
Students need to see instructors clearly. Instructors and lifeguards need dependable views of swimmers above and below the water. Parents need comfortable viewing areas, and staff need safe, well-lit routes throughout the facility.
The lighting system must also withstand conditions that quickly damage ordinary commercial fixtures.
At LED Pros WorldWide, we help swim schools, aquatic centers, contractors, engineers, architects, municipalities, schools, healthcare facilities, and recreation departments select lighting designed for demanding indoor pool environments.
Our team can help evaluate:
Fixture type
Lumen output
Beam distribution
Mounting height
Glare control
Photometric layouts
Marine-grade powder-coated finishes
316 stainless steel hardware
IP-rated sealed construction
Lighting controls
Retrofit planning
Warranty options
Explore our LED Indoor Swimming Pool Lighting Fixtures or speak with a lighting specialist about your new construction or retrofit project.
Call 1-844-533-7767 today to discuss corrosion-resistant LED lighting for your swim school or indoor aquatic facility.
Frequently Asked Questions
What type of lighting is best for an indoor swim school?
Corrosion-resistant LED fixtures specifically designed for natatoriums are usually the strongest choice.
Depending on ceiling height and layout, the system may include sealed LED high bays, suspended fixtures, wall-mounted lights, architectural fixtures, and separate lighting for viewing and support spaces.
Why is indoor pool air corrosive?
Chlorine reacts with organic contaminants in pool water to form chloramines.
These compounds can become airborne and circulate throughout the warm, humid natatorium. They attack metals, coatings, fasteners, drivers, wiring, and other fixture components over time.
How long should natatorium LED fixtures last?
Premium LED fixtures may be rated for 50,000 to 100,000 hours or more.
Actual service life depends on fixture construction, driver quality, thermal management, corrosion resistance, operating hours, maintenance, ventilation, and environmental conditions.
A high LED-life rating does not guarantee a long fixture life if the housing, screws, seals, or driver fail prematurely.
What IP rating should indoor pool lighting have?
Many indoor aquatic applications use IP65 or higher fixtures.
The exact requirement depends on fixture location, exposure, cleaning methods, local codes, and project specifications. The fixture must also be suitable for chloramine-rich environments because an IP rating addresses enclosure protection rather than chemical corrosion resistance.
How can glare from pool lighting be reduced?
Glare can be reduced through:
- Proper fixture positioning
- Controlled beam distributions
- Shielding
- Indirect illumination
- Balanced mounting heights
- Improved uniformity
- Evaluating reflections from instructor and lifeguard viewpoints
A photometric design should evaluate more than light levels on the pool deck.
Do underwater pool lights replace overhead lighting?
No.
Underwater lighting may improve appearance, orientation, and visibility within the pool, but it does not replace overhead and vertical illumination needed for instructors, lifeguards, decks, ramps, exits, and spectator areas.
How often should natatorium fixtures be inspected?
Inspection frequency depends on operating conditions and facility policies.
High-use facilities should perform regular visual inspections for corrosion, condensation, coating damage, loose hardware, flickering, lens discoloration, gasket deterioration, and mounting problems.
Any fixture showing moisture intrusion or structural deterioration should be evaluated promptly.
Can existing wiring be reused during an LED retrofit?
Sometimes.
Existing wiring, voltage, circuits, controls, junction boxes, and emergency systems should be inspected by a qualified electrical professional. Older systems may require upgrades to support new controls, dimming, emergency drivers, or revised fixture locations.
What information is needed for a swim-school lighting quote?
Useful project information includes:
- Pool dimensions
- Ceiling height
- Building plans
- Fixture quantity
- Existing wattage
- Voltage
- Fixture photographs
- Mounting type
- Operating hours
- Desired light levels
- Control requirements
- Maintenance-access limitations
- Corrosion concerns
The more complete the project information, the more accurately the lighting system can be selected and laid out.
Stay Connected with Our Lighting Resources
Add IndustrialLightingFixtures.org as a Preferred Source on Google to see more of our lighting guides and technical resources across Google Search experiences.
Related Indoor Pool & Natatorium Lighting Resources
Continue planning your indoor aquatic lighting project with these related resources:
LED Indoor Swimming Pool Lighting Fixtures – Explore sealed, corrosion-resistant LED fixtures designed for natatoriums, swim schools, aquatic centers, and indoor pools.
Natatorium Lighting Design Guide – Learn how to plan lighting for large indoor aquatic facilities, competition pools, therapy pools, spectator areas, and community recreation centers.
Commercial LED Ceiling Lights – Compare lighting options for reception areas, viewing rooms, offices, locker-room entrances, and other spaces adjacent to the pool environment.
Commercial LED Lighting Retrofit Guide – Plan fixture replacement, budgeting, scheduling, installation, commissioning, and phased upgrades.